

When I first started taking food photos I was an absolute amateur in photography at all. Now I don’t think I’m a super pro but for about two years I’ve read and learned a lot about food photography and I could give you some tips and tricks for beginners. I made this food photography blog to share what I’ve learned, show you my mistakes as a beginner and to help you on your way to perfection.
Food photography – Tips and tricks for beginners
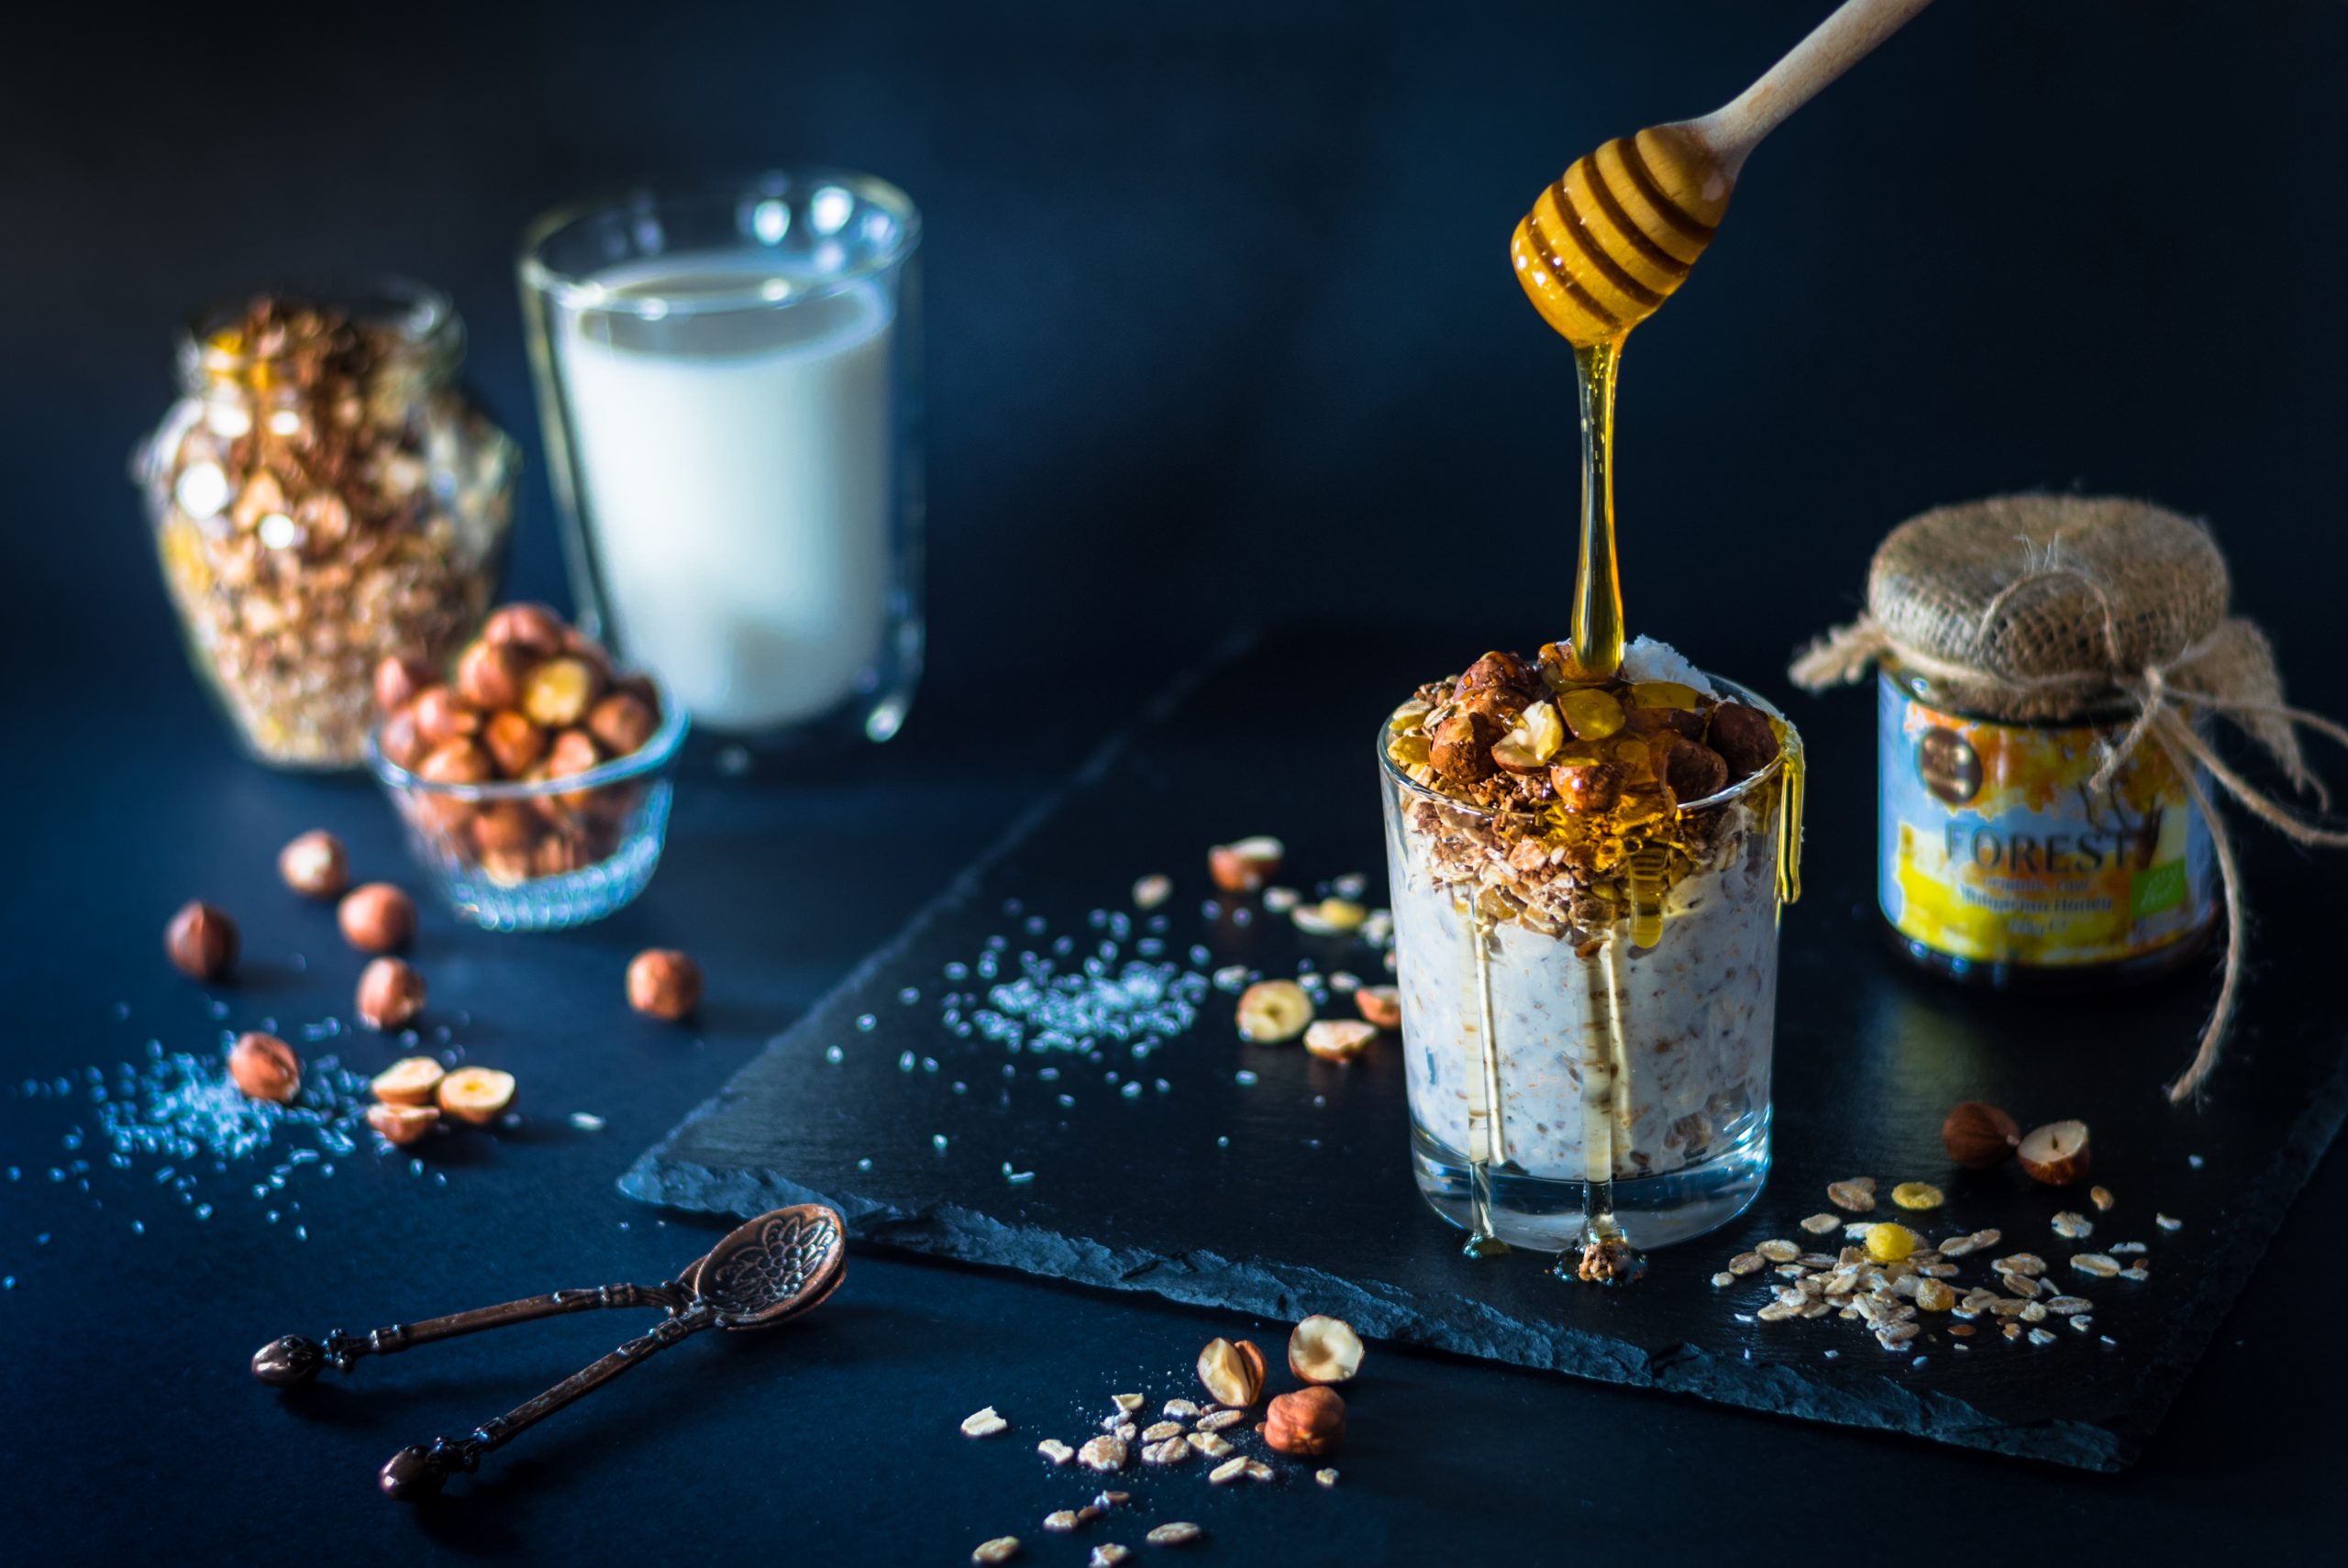
LIGHT
I’ve shown my first food photo in another article as well. I really spent a lot of time on this dessert –I made chocolate bowls, and while I was trying to make them look good it got dark. No problem at all! I have lamps, don’t I? Mistake number 1. Do not shoot on lights. I am talking about home lights. I, of course, lighted as many as I could, not thinking that one is with day light, the second is yellow, the third is white and another type of light was coming through the window. It makes me laugh now. Never mix lights because this is what you get – a yellow photo and many unnecessary shadows.
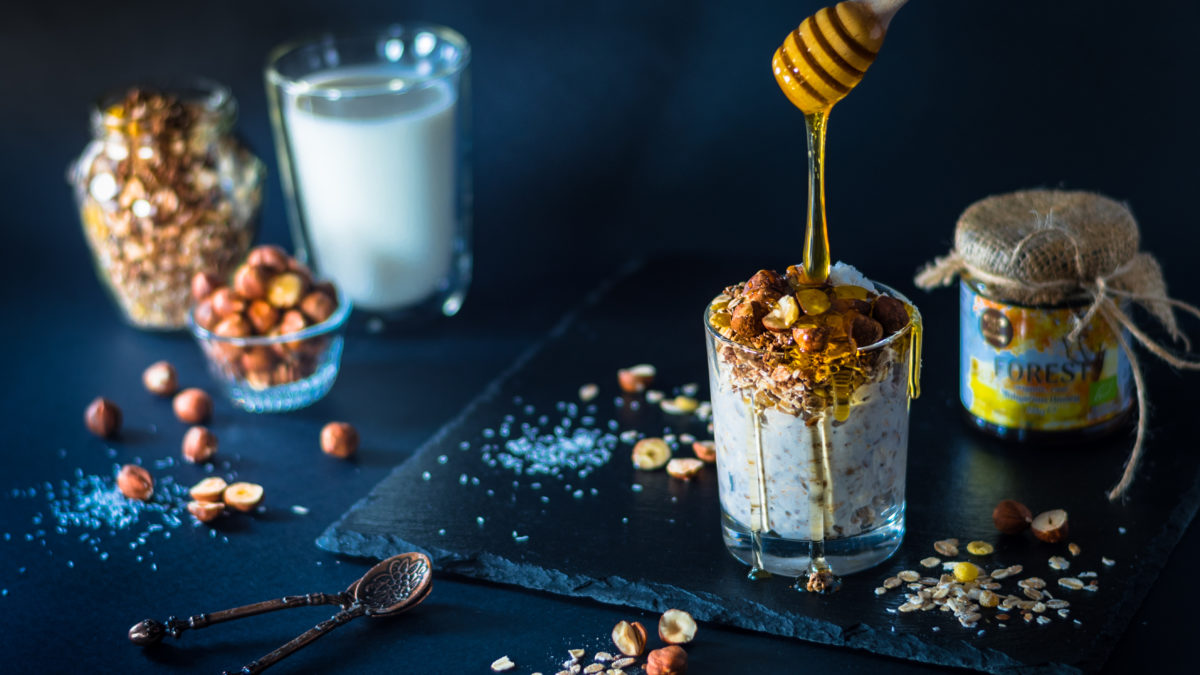
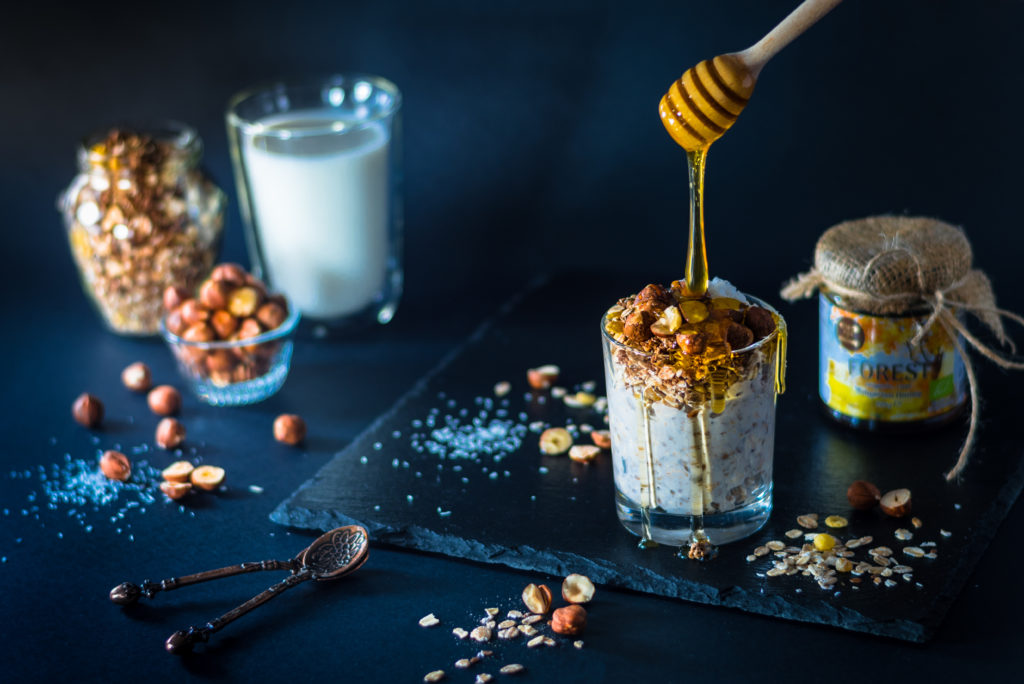
I mainly shoot at natural daylight. If I have to take pictures for a client or for some other reason and the light is limited I use professional photography lighting. An example for a photo.
Another mistake you could make is taking pictures in the sun. By noon a lot of sunlight is coming through the window I am usually shooting next to at home. When I am taking photos at sunlight there happens to be great contrast between the illuminated and non-sunny parts and sharp and dark shadows appear. You should avoid this but if it is necessary use a diffuser which will disperse the sunlight.
Following you will see a photo in which I have used a diffuser and a reflector. And it is obvious that the light and shadows are very soft and pleasant.
Food photography – Tips and tricks for beginners – Color combinations
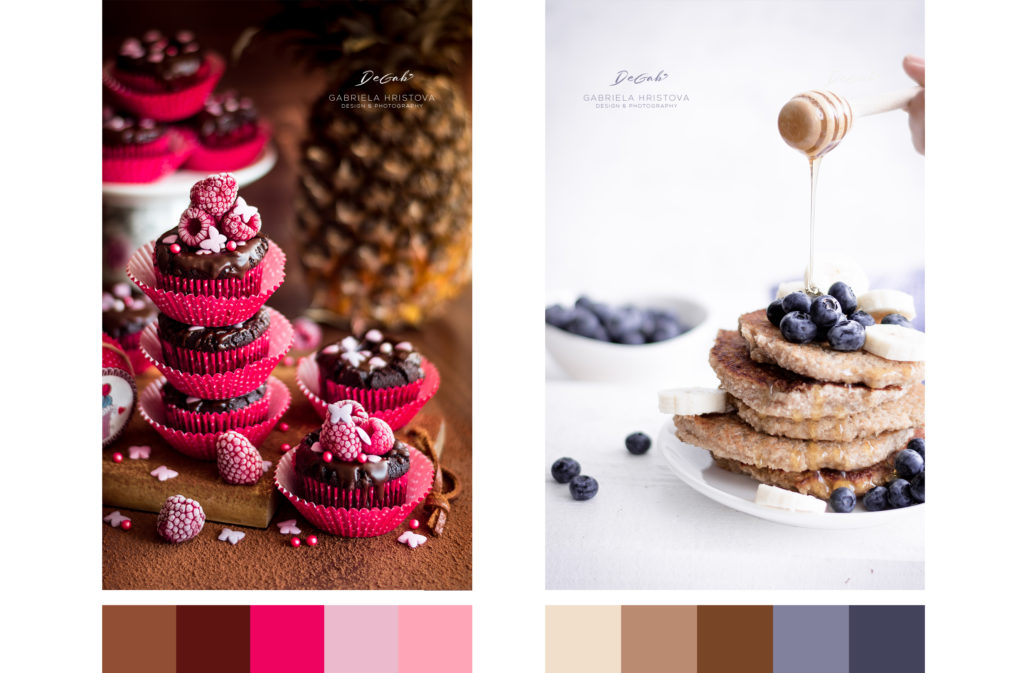
Do you think about the color scheme when you take a photo? If you don’t, now is the right time to start. One of the secrets to keep your eye on a photo is balanced and harmonic colors.
In my color combination article I have widely explained how exactly to combine colors so I am not going to comment on that again. It’s a science which could be said a lot about. Below you will see two examples for color combination. Think about the colors once you start preparing the food. For example if you have pink napkin which you want to shoot your muffins with you may use pink muffin moulds and you may buy fruits with matching colors.
Tell a story – Tips and tricks for beginners
Photographs can speak. You can make them say whatever you want.
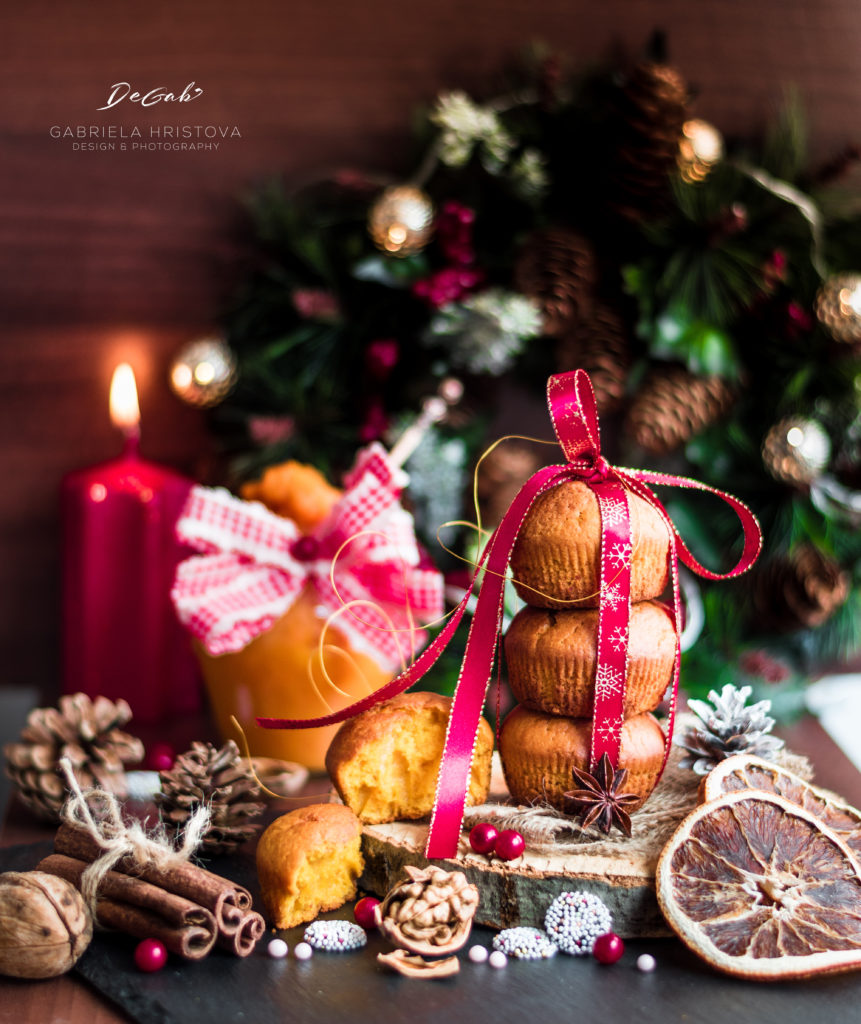
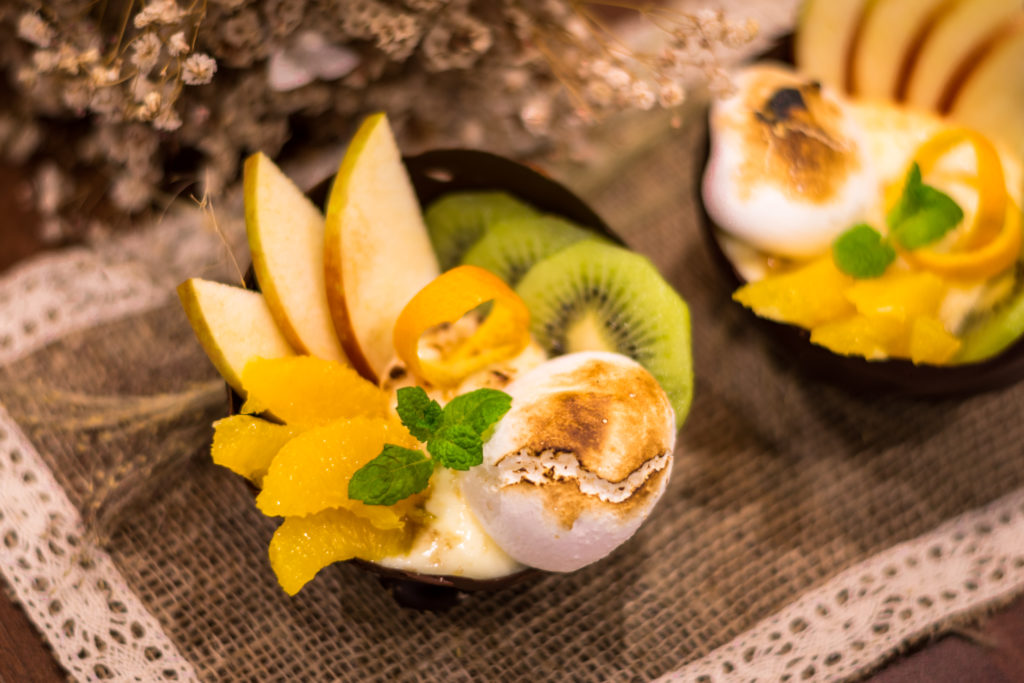
This photo is literally screaming “Christmas”. The Christmas wreath in the back, the red lit candle and the Christmas ribbon suggest that it’s Christmas.
The components around the muffins suggest what they are made of. For example they are made with cinnamon and walnuts which you cannot see, that’s why I added cinnamon sticks and walnuts beside. These are pumpkin muffins so I intentionally put a jar of pumpkin mash in the back.
It there is vanilla in your recipe just add one vanilla stick in the photo, if there are fruits add them on the side. I love photos which you could taste the food from. If you have banana bread without bananas on the side no one is going to recognize it because it looks like a simple cake.
Food photography – Photograph background
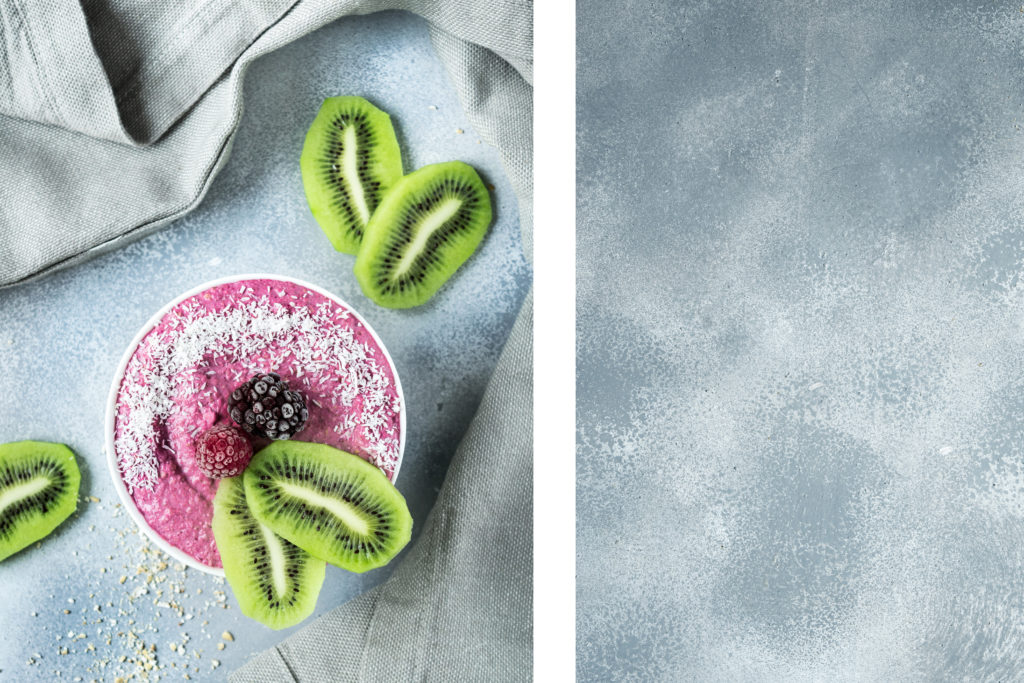
The background is a very important part of your photograph. It is the base of the photo and it should be carefully chosen.
My article is for beginners so I am not going to tell you to buy several different backgrounds and use them. You can surely do this if you want to but what I am trying to say is that you can make your own very impressive backgrounds at no cost. My favourite is the one in the photo below.
This is a spare piece of my kitchen worktop which I asked the carpenters not to throw away. To be precise this is its back side where something like very thick paper was stuck on. Using two paint sprays (white and gray) and a dish sponge I managed to achieve an interesting effect suitable for photos. The bonus is that on the other side it is wooden and I am able to use it too. I’ve used the wooden side in the Christmas photo above.
Another thing you could do is buy marble effect paper and stick it on thick cardboard. I am also taking photos on wooden boards which I painter white myself. Sometimes I use simple black cardboard or two tiles left from my corridor’s floor.
I am sure you already have an idea for a background just go fulfill it.
This article is going to have part two. Now I am going to enjoy the good weather. See you soon!