I doubt there’s left somebody not knowing my love to cherries or who hasn’t noticed my special attitude towards them.
I cannot help buying cherries whenever I see them. I’ve already made a cake with cherries so this time I’ve decided to add them to a homemade ice cream. I will start with the recipe for this homemade ice cream because I am certain that you can’t wait to see it. After that I will continue with the photo and the hidden defect in it. Have you found it?
Recipe for homemade ice cream with cherries
- 500 g strained yoghurt
- 300 g condensed milk
- 300 g cherries
Instructions
- Mix the yoghurt and the condensed milk
- Wash the cherries, remove the pits and cut the cherries in halves. Then put them in the mixture
- Stir carefully and freeze the mixture for a night
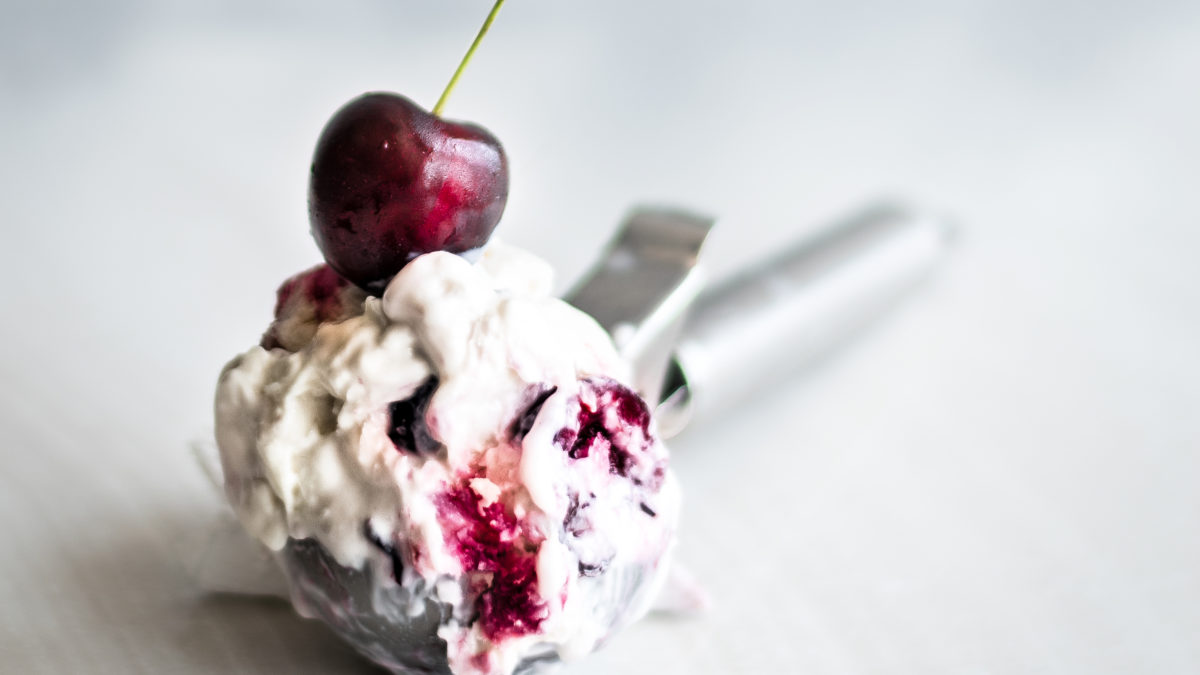
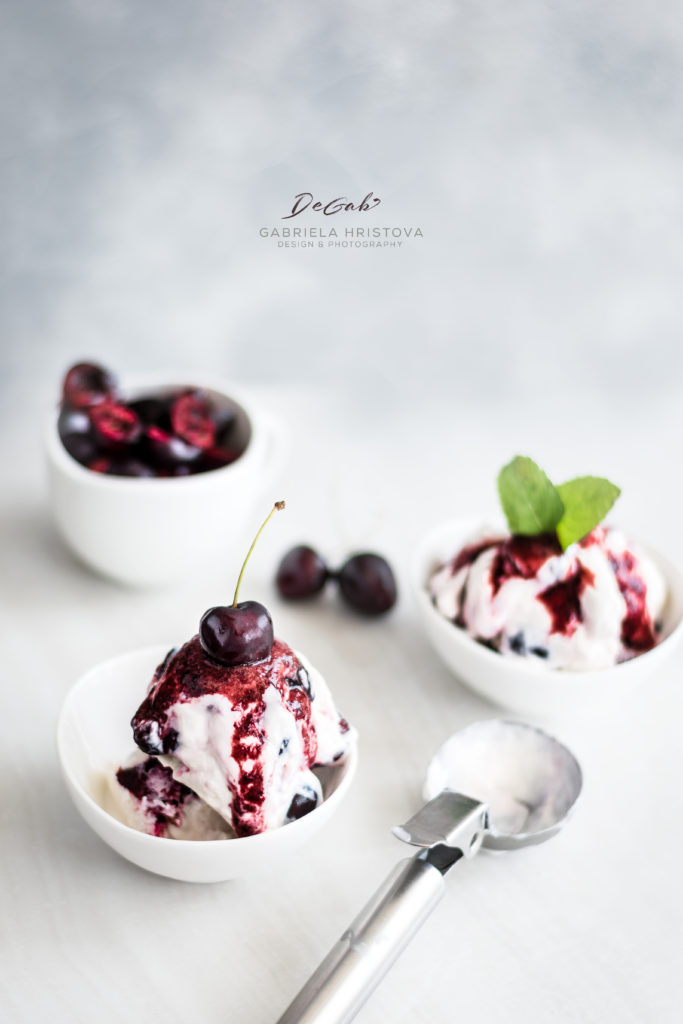
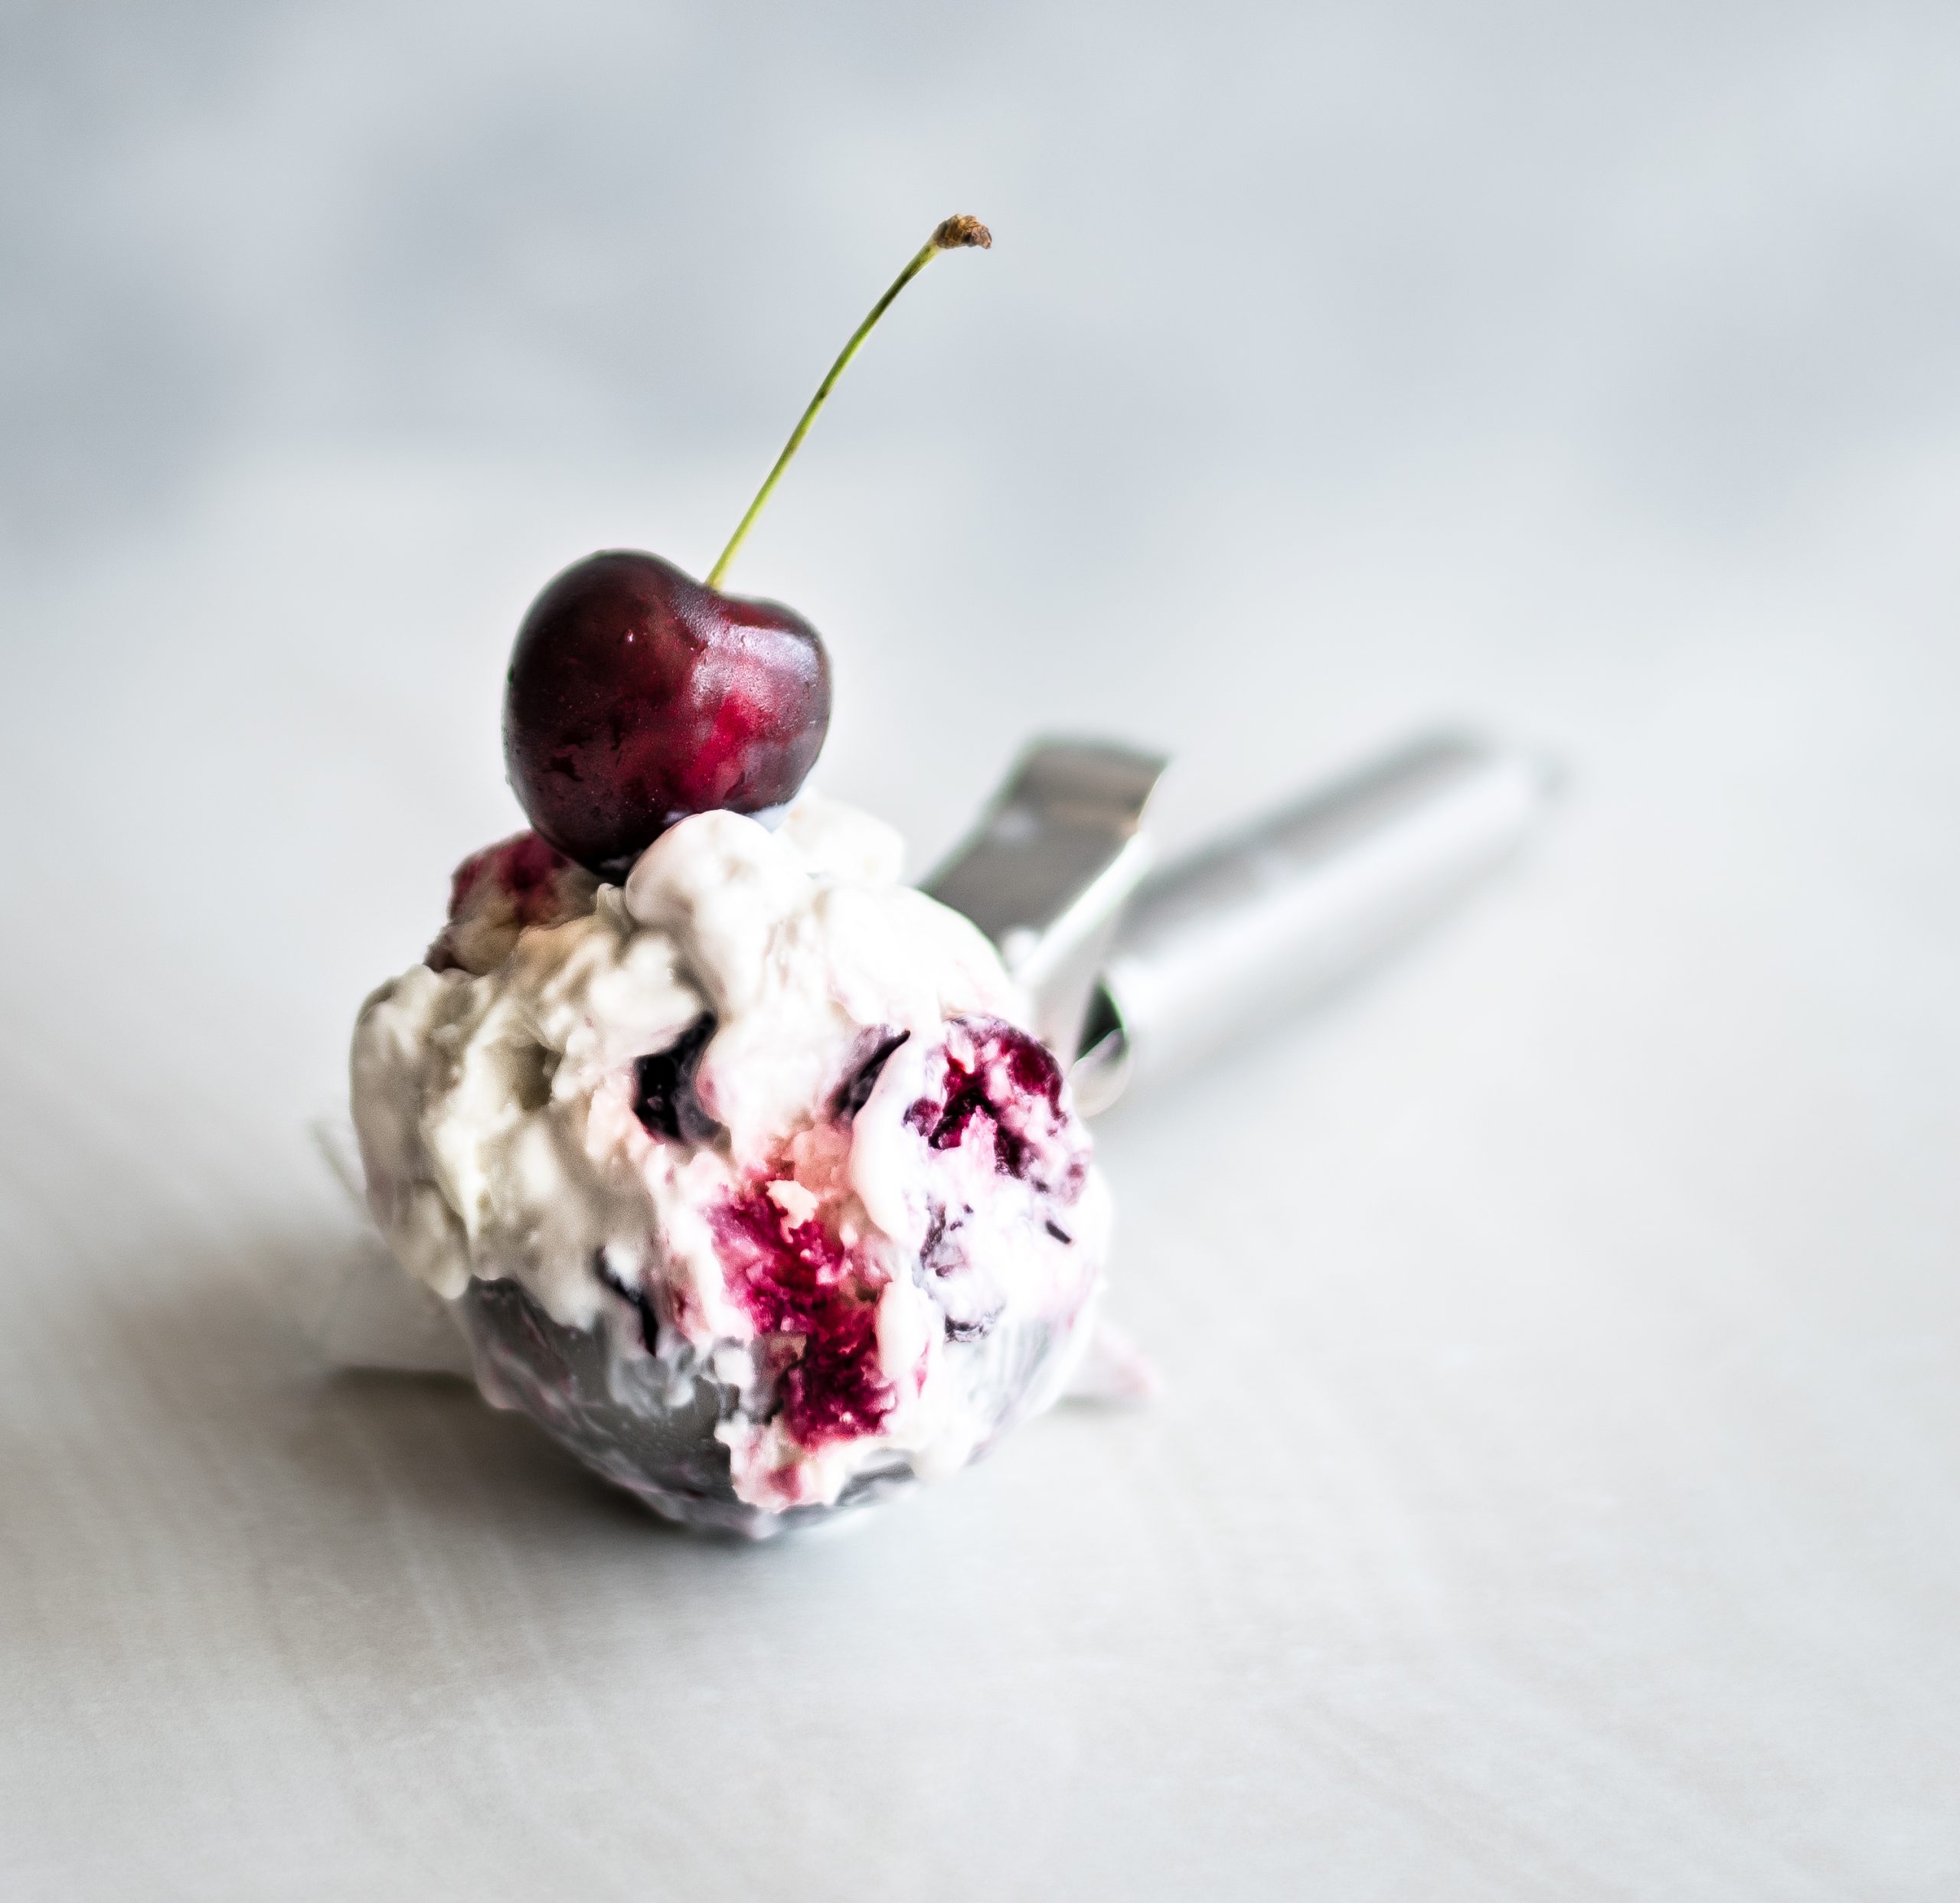
- You can blend some cherries before serving the ice cream. They become like a sauce and you can pour some on top. In the photo below the ice cream is with this sauce.
I don’t know if someone is going to read the article until the end after this easy recipe. If you do so I will show you a simple rule to follow when taking photos.
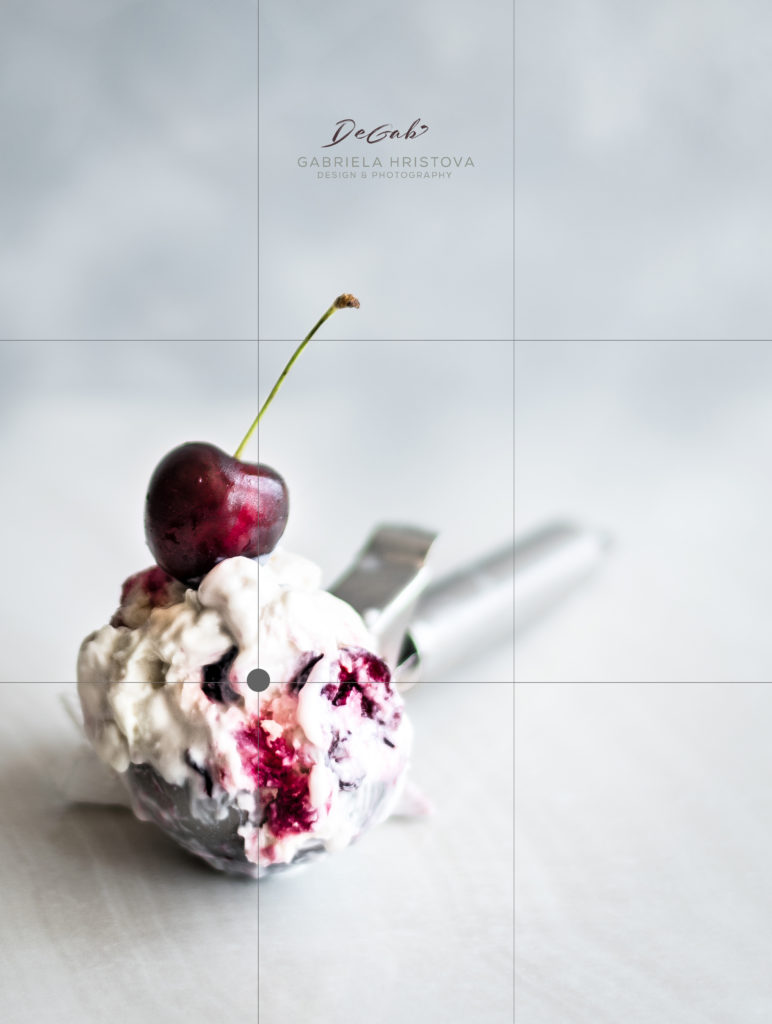
It is the Rule of Thirds. Thanks to this rule none of you had noticed the defect I mentioned above from the first sight. I myself noticed it a bit late so I decided it was a good example.
What is the Rule of Thirds? Generally speaking you divide the frame in 9 equal sections using two vertical and two horizontal lines. The strongest points in the photo are where the lines are crossing. Thanks to this rule the first thing you see when you open the photo is the ice cream at the front and then you look behind it.
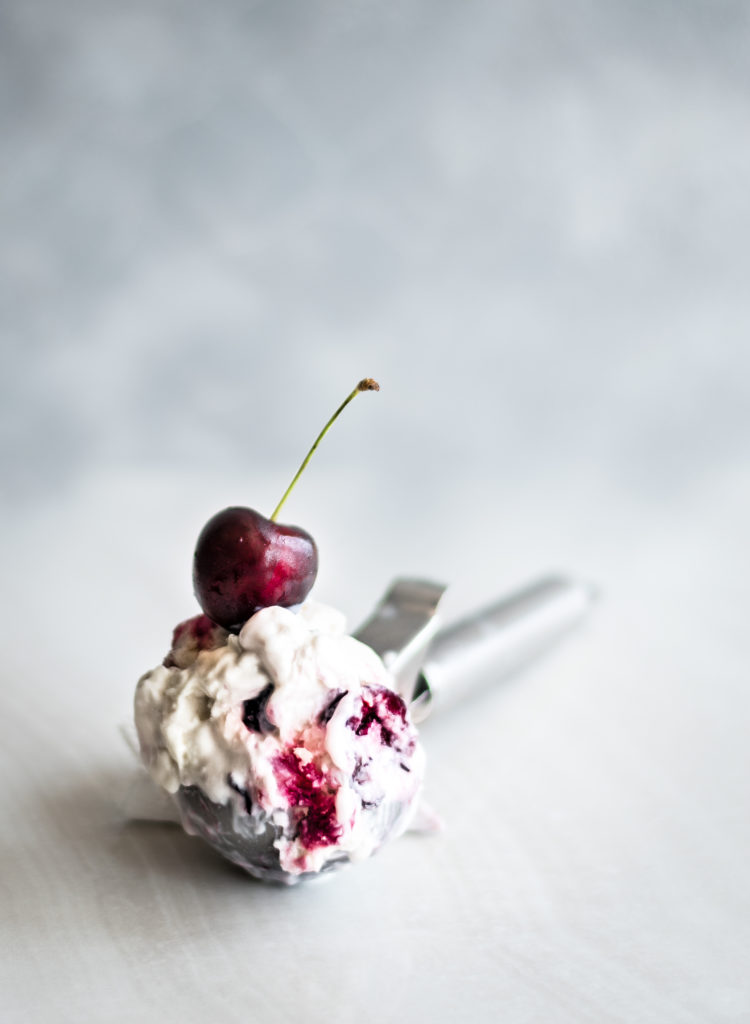
You’ve probably noticed the defect already.
I had made the scene and the camera was on tripod stand then I spooned the ice cream out and when I wanted to fix it for the shot it would fall.
I am going to tell you a secret of how to take photos of ice cream. The secret is …shooting fast… because it melts. And homemade ice cream melts even faster. So I looked around and the first thing I saw was a napkin. I decided to fold it and to prop up the spoon in the back. I made the shot fast and I didn’t even notice that the napkin could be seen.

I could easily erase the napkin with Photoshop but I decided it would be a good example to clearly explain the Rule of Thirds.
Next time you take a photo just put the object at one of the points where the lines are crossing and you will be sure that your photo is well composed. Sunny day!
Don’t forget to tag me in Instagram. I am eager to see your photos.